Make
Make.com is a popular workflow builder with a free-tier that supports Webhooks. You can connect hundreds of tools together - even Advite!
Use Make to Fill your CRM with Advite matches (i.e. Hubspot, Salesforce, Zoho, and more!) Fill a Google Sheet with Advite matches Connect to platforms Advite doesn’t yet support (like Discord)
Here’s a guide on getting started with Make.
Note: Zapier, Make, and n8n all offer a variety of connections and enrichments. These tools all bill slightly differently & have different allowances on their free & paid plans. Choose the best tool for you & your business.
1. Create a Webhook in Make
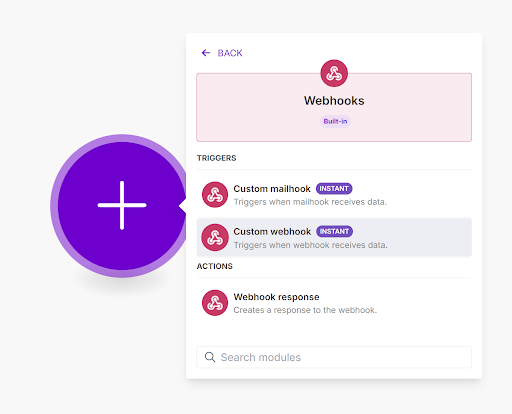
In your Scenario in Make, create a Webhook.
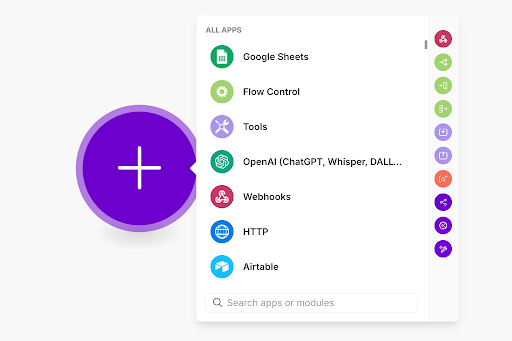
Select ‘Custom Webhook’.
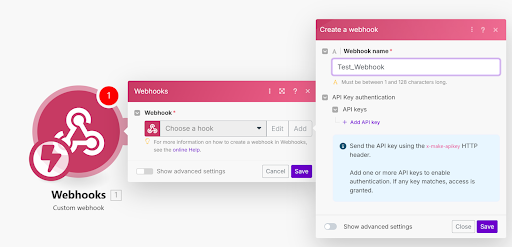
Click Add. Then, name your Webhook. We named ours ‘Test_Webhook’. Hit Save.
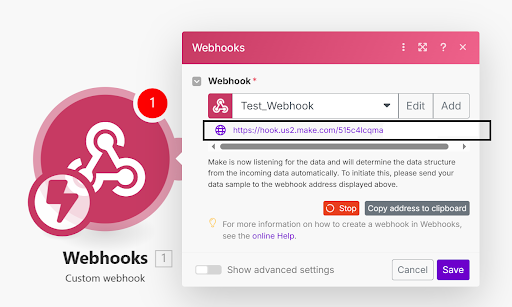
This will give you a webhook link - see the black box in the image below. You’ll need this for Step 2!
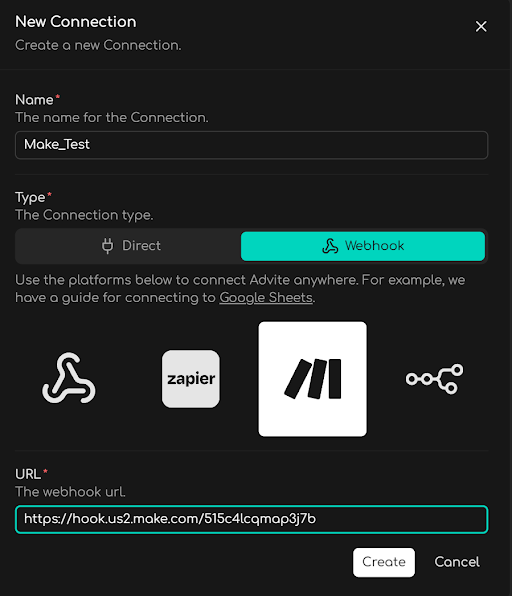
2. Create the Webhook Connection in Advite
Inside Advite, go to Connections > New Connection.
Select Webhook, and then Make.
In the URL field, enter the URL from Step 1 into the field. Hit Save.
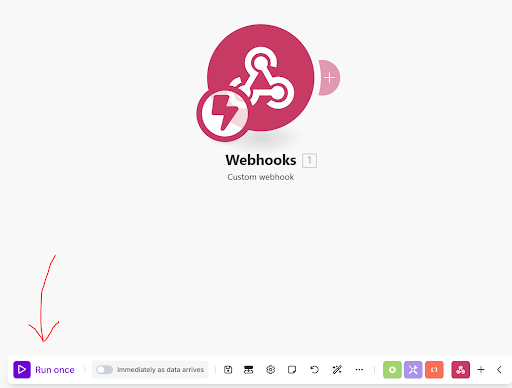
3. Test the Webhook
In Make, click “Run Once” on the bottom menu bar
In Advite, click the vertical menu (⋮) and click Test
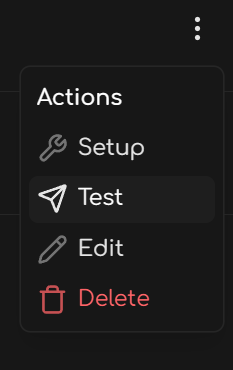
If you’ve done everything right, Advite will mark the connection as Connected.
4. Add a destination for the data → Google Sheets
You can ultimately send the data anywhere Make supports, but for this example, we’re going to dump the data in Google Sheets.
First, create your Google Sheet.
Title your Columns for ease. The example columns are for a Reddit Webhook, but you can name them for any webhook Advite supports. See the various fields our Webhooks send here
For Reddit, the webhook fields are: type, time, id, title, text, url, subreddit.id, subreddit.name, subreddit.url, user.id, user.name, and user.url
Note: You can name your columns in Google Sheets ANYTHING YOU WANT. The below example names them after the webhook field types for the purpose of this guide

Then, in Make, Press the + Button to add another Module. Click Google Sheets > Select Add a Row.
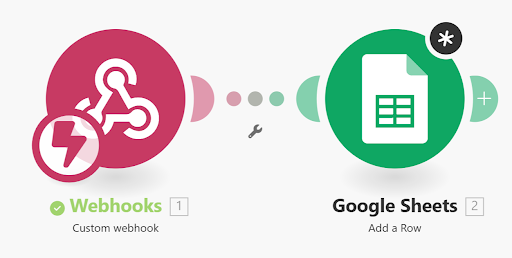
Connect Make to your Google Account, then select your Google Sheet that you plan to dump the webhook data to.
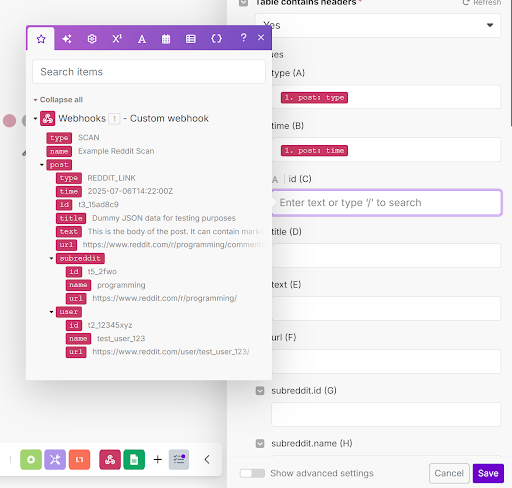
Then, map the values from the Webhook to the Columns. It should look like the below.
You can just click on the element names from the Webhook to map them to the Google Sheet columns:
5. Test and Schedule
In Make, click Run Once.
In Advite, click Test.
The data will now be in your Google Sheet.

Optional
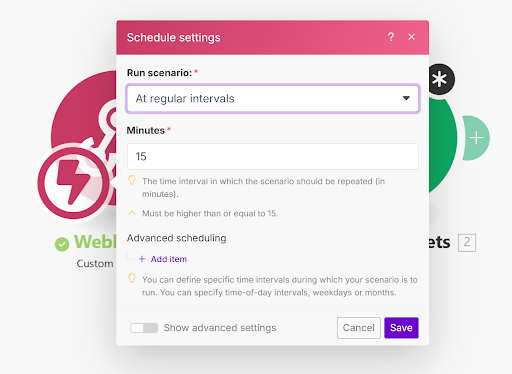
in Make, click the Lightning Bolt and set up the Run Frequency.
For example, you can have it fetch every 15 minutes using the setting for ‘At Regular Intervals’. The more frequent Make fetches, the more Credits it will use. It’s up to you how often you want it to fetch!
6. Add the Connection to your Monitor
Now that you’ve configured the connection, you still have to add it as a Notification Type on your Monitor.
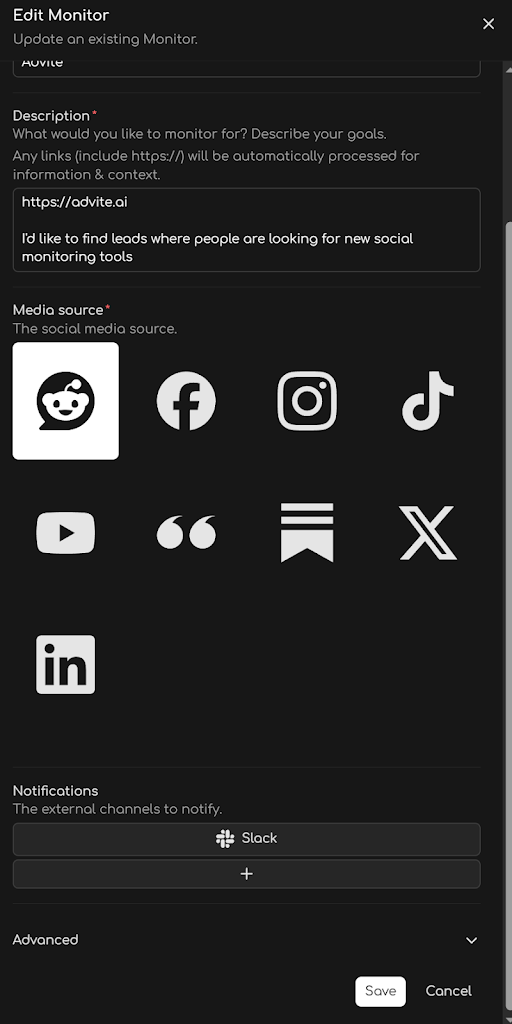
Click Edit > Settings on your Monitor.
Then, under Notifications, hit the + button to add a new notice type.
Select Make, then select your Make Connection.
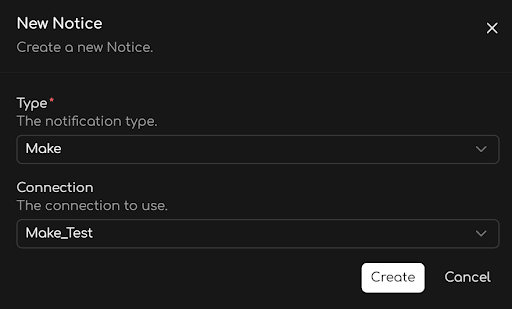
Hit Create, and Save on the Monitor
You are done! Your Advite alerts will now automatically fill this Google Sheet using Make.